6 November 2015

Bangle wall hangings

Bangle wall hangings
I love wearing accessories that match my outfit. But what do you do so when u have so many bangles of same color and you aren’t wearing them anymore? Well here is what you do with it – Bangle craft ! Yes! I bought these new glass bangles to materialize my bangle craft idea and with lot of efforts,after breaking so many bangles in vain, i finished it with a beautiful bangle craft wall hanging! Read more on how to make these in simple steps!


Materials required to make bangle craft :

  • Glass bangles
  • Candle & matches
  • Feviquick
  • Thread
  • Kundan/button/mirror/embellishment ( Itsy Bitsy cut mirror)
  • Wire cutter


Tutorial for making Bangle Craft :

  • The whole idea of making this bangle craft lies in bending the glass bangles and that requires some practice – you are gonna waste atleast 3 bangles to learn the right heat and right pressure to be applied. So here we go :

  • First of all take caution while making this bangle craft because it requires breaking the glass bangle and also heating them so this is strictly NOT a kids craft.
  • Take your bangle and cut a small piece out of it using the cutter. The size of the piece is your wish – the larger the size, thinner & smaller will be your petal size. Do not throw away your smaller piece cz thats going to be used for making smaller flowers :)
  • Now, mark the center of your bigger piece – that has to be atleast nearer to the center or else you will end up with petals having tails!
  • Light your candle. Now hold your marked point of your bangle piece right above the flame. The glass bangle is going to take atleast 1 or maybe another half more minute to start being flexible. (Tip: While you holding the bangle above the flame, do not try to bend it. Just hold it loose. As it heats up, it will bend on its own).
  • Bend the bangle in such a way that the two open ends come together. ( Do not heat the bangle further as it can make it curl and that will make the gluing up part difficult)


  • The number of petals that you make totally depends upon your choice. Here, I have used 4 petals in two layers for the main flower and 5 petals single layer for the smaller flowers.
  • The smaller glass bangle pieces that were cut out can also be bent the same way as before but with a little more caution as they are smaller pieces and might heat up more.
  • Now before you glue up the petals into a flower for the base layer, its better to mark the layout arrangement on a paper and start gluing so that you dont end up in an assymetric shape.
  • For the ssecond layer, arrange the petals over the first layer such that the flower looks complete.
  • For making the single layered flower, Ive used a small but if transparent sheet over which the petals were arranged and glued.
  • Now hang them up the way you feel like of stick them with double sided tapes :)
  • Did you like this glass bangle wall hanging? Do try them out yourself and link them to back to me so that i can see them too :) Also, here are some other glass/metal bangle projects i would love to try out 


30 October 2015

Sew a non-slip sewing machine foot pedal pad

Sew a non-slip sewing machine foot pedal pad

Sewing gives me a lot of pleasure, but actually sometimes also quite a bit of pain.  I get a pain in my back when I sew for a while, and when I took a good hard look at that recently, I realised that a lot of it may be due to the fact that my foot-pedal leg often starts off in a comfortable position, but the more I sew, the more it extends outwards as I chase my foot-pedal across the floor.

I have a tiled floor and the foot pedal seems to slip further and further away throughout my sewing session, until I have to fish it back again.  It’s this sitting with one leg extended, sitting at an angle that I’m convinced in a back-breaker for me.  So I set out to solve this dilemma and sew a non-slip sewing machine foot pedal pad.

It’s not pretty, but it works, and that’s what matters.  My foot pedal stays put now a lot more than it did before.  I think this would work if you had a wooden floor or carpets too, not just for tile.  Here’s how you can make one – it’s pretty cheap!

Materials to make a non-slip sewing machine foot pedal pad

Sew a non-slip sewing machine foot pedal pad

Roll of non-slip spongy material, often sold as drawer or shelf liners  (alternative UK Link)
Some fleece, batting, felt or similar
Quilting cotton, or other fabric, less than a Fat Quarter
Straight cut or bias strips, 2.5 inches wide
Start out by measuring your foot pedal and decide on how big you want your mat to be.  I’m guessing the bigger you make it, the more grip it will have.  But bear in mind, this stuff is non-slip so it will also grip onto all your little pieces of thread too and could end up a big thread nest, so don’t make it huge.

Sew a non-slip sewing machine foot pedal pad

 I drew a rough ‘pattern’  from a sheet of paper and used it to cut 2 pieces of the non-slip liner.  Make it round, oval, square – whatever you like.  I made mine rectangular so that I had some padding under my heel too.

Sew a non-slip sewing machine foot pedal pad

Now make or unwrap some binding tape.  If your mat is square, you can use a straight cut binding.  A jelly roll strip would be ideal for that.  If you’ve made it round or oval, you’ll want to use a bias binding tape.  Check out these tutorials on how to estimate and make continuous bias binding, and how to get neat corners.

  • How to make continuous bias tape
  • Bias tape calculator and cheat sheet
  • How to get neat binding corners


Sew a non-slip sewing machine foot pedal pad

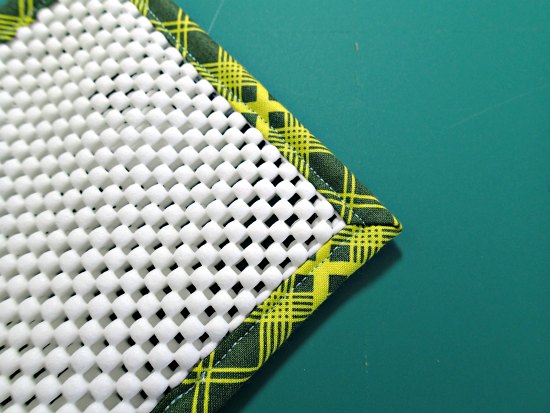
Apply the binding all around the outside of the two layers of non-slip grippy stuff.  You might find because it’s grippy, that it’s going to grip to the plastic of your sewing machine.  If that’s the case, slip some tissue or even some regular paper underneath to help it feed through.  Here’s mine sewn to the paper.  It perforates as it sews so it just pulls off afterwards.

Sew a non-slip sewing machine foot pedal pad

I folded my 2.5 inch binding in half and sewed it to the top, then folded it over to the back and stitched again.  It’s not the greatest of neat jobs, but hey, who’s looking under my sewing table! Get out of there…

Sew a non-slip sewing machine foot pedal pad

Because we are constantly applying pressure to the back of the pedal, it can still slip forward so I thought having something to prevent it slipping off the front of our mat would be a good idea.  I created a roll of some scraps of felt that I had layered with some fabric.

Sew a non-slip sewing machine foot pedal pad

Cut a rectangle of fabric a couple of inches wider than the mat.  Cut your inner padding piece an inch narrower than your mat.

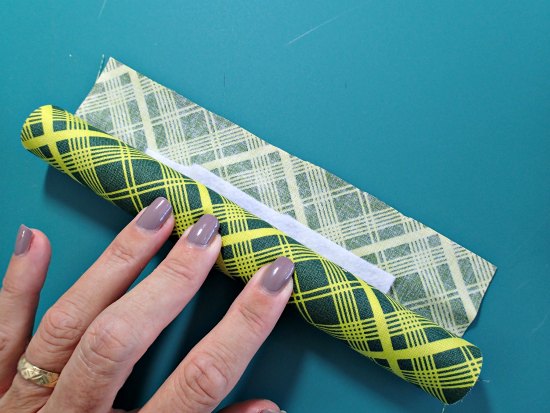
On the wrong side of your fabric, place your piece or pieces of felt, fleece or batting and start to roll it up.  When you get it as thick as you want it, snip off any remaining filling.  Leave your fabric an inch longer.

Sew a non-slip sewing machine foot pedal pad

Turn under the raw edge on your fabric, roll it up and then hand stitch it down to complete your ‘sausage’  to go at the front of the mat.  The ends should be thin, without the filling so these will be easier to sew.  You can even get your scissors in there and snip any fabric from the center of the roll that you don’t need.

Sew a non-slip sewing machine foot pedal pad

Now tuck in under the ends on your stopper roll, and tuck those ends underneath to the back side and stitch them in place.

Sew a non-slip sewing machine foot pedal pad

t’s done.  Place your foot pedal where you want it to go, more confident now that it’s going to stay in place better than it did before.  Your back will thank you.

Sew a non-slip sewing machine foot pedal pad

28 Sewing Hacks That Will Change Your Life

Sewing is a craft that requires great concentration and skill. Though thoroughly rewarding and enjoyable, certain aspects of sewing are also difficult to manage. From threading a needle to keeping track of your sewing supplies, the little challenges of sewing can add up to make for a draining and frustrating process. However, it doesn’t have to be. We here at Seams and Scissors have compiled 28 Sewing Hacks That Will Change Your Life that will make your sewing experience easy as pie. These amazingly clever tips will save you so much time and allow you to create fun and creative sewing projects without stress. Once you learn these amazing tips and tricks, you won’t believe you ever lived without them.
28 Sewing Hacks That Will Change Your Life

28 Sewing Hacks That Will Change Your Life

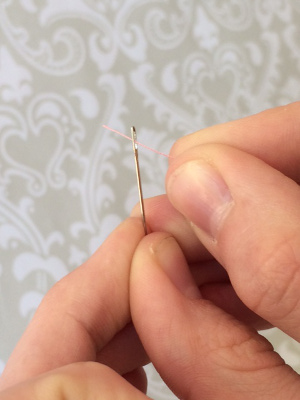
1.  When threading a needle, spray the tip of the thread with hairspray. It will stiffen and easily pass through the eye of the needle.

28 Sewing Hacks That Will Change Your Life

 2.   Keep a magnet handy to pick up spare pins and needles.

3.  Use steel wool as stuffing for pin cushions to keep your pins and needles sharp and shiny.

4.  If you don’t have a bodkin handy,  you can use a safety pin to add elastic or cording to a waistband or seam.

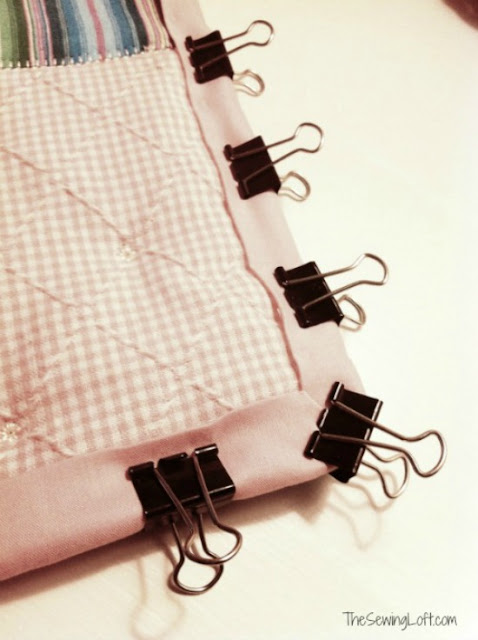
5.  Use binder clips instead of pins for fabrics such as leather that are easily damaged. They can also be used to hold binding together on a quilt.

28 Sewing Hacks That Will Change Your Life

6.  Washers, nuts and bolts, or even coins can be used as pattern weights in a pinch.

7.  To prevent fraying, cut your fabric out with pinking shears.

8.  Apply clear nail polish to the top of buttons to keep threads in place.

9.  Use a bar of soap as a pin cushion.

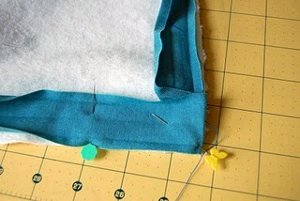
10. Fake a hem with bias tape.

28 Sewing Hacks That Will Change Your Life

11. Tie your scissors around your neck with ribbon to make sure you never misplace them while sewing.

12.  Use old blankets as batting for quilts.

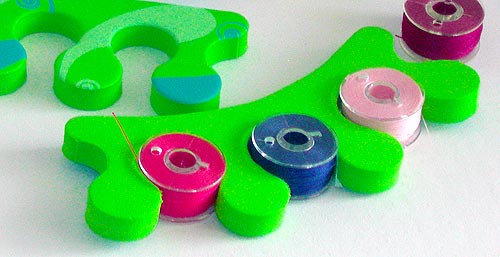
13.  Use toe separators to store your bobbins.

28 Sewing Hacks That Will Change Your Life

14.  If you’re using a slippery fabric, put a layer of muslin under it and pin the layers together before cutting.

15.  Cut a straight line through burlap by pulling out one strand and cutting along the gap.

16.  Use a hair straightener to press fabric between buttons or embellishments.

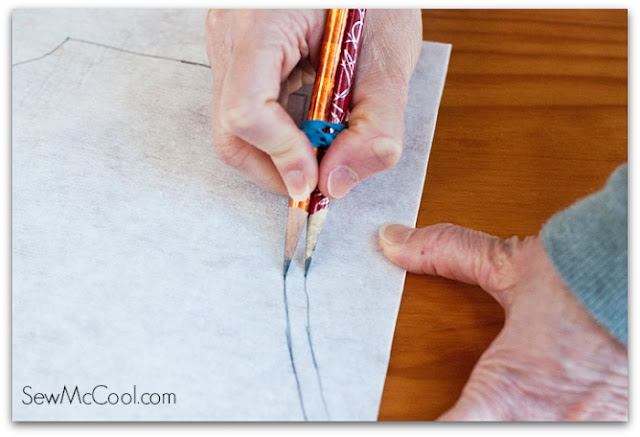
17.  Add an easy sew allowance to any pattern by rubber banding two pencils together and tracing the pattern.

28 Sewing Hacks That Will Change Your Life

18.  Substitute soap for chalk when tracing lines on fabric.

19.  Store pins, needles, and thread in a matchbox for a mini, on the go sewing case.

20.  Have a spool that is too big for your sewing machine? Place it in a mug next to your machine directly under the spool pin.

21.   Pin a button hole so you don’t rip it open too far.

28 Sewing Hacks That Will Change Your Life

22.  Attach a tape measure to the edge of your sewing table so your measurements are always exact and you never misplace your ruler.

23.  Sew extra buttons on the inside of a coat sleeve so you never lose them and they’ll always be handy.

24.  Use freezer paper to cut out patterns by pressing the paper to the fabric, causing it to adhere. You will easily be able to cut the fabric without weights and without cutting out your pattern pieces.

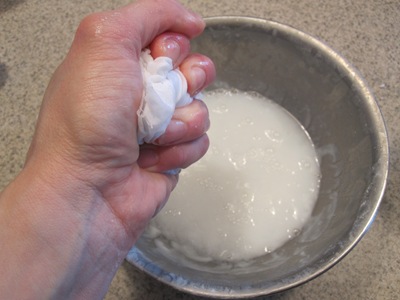
25.  You don’t have to buy expensive fabric to print photos or designs. Instead, soak your plain cotton fabric in a mixture of Alum, washing soda, fabric softener, and hot water to get vibrant colors that won’t bleed.

28 Sewing Hacks That Will Change Your Life

26.  Use bobby pins to hold pleats in place while ironing.

27.  Use sponges to move fabric while machine quilting.

28.  Sharpen dull scissors by cutting tin foil or sandpaper.

28 October 2015

Temporary for the birds of the branches

My dear gardeners) offer you the idea for the vertical gardening. Below the photograph with ivy, but you can use any vine, any climbing plant, to allow him to quietly climb up a fence or wall, but much of it to create beautiful decorative composition decoration terrace or balcony. I suggest you make a decorative wire cage

This bird you can buy in stores, they have to buy from Chinese manufacturers


Make a Topiary is a snap. Twigs are connected by wire gotovyya cell paint spray painted, in this embodiment, silver


Charming truffle boxes

Charming truffle boxes
Thanksgiving candy for the guests with the activities or just a pleasant surprise for a loved one. Here, in principle, and all-purpose form of this charming truffle boxes. It is very easy and fast! In art you'll find the recipe template.
Charming truffle boxes

What is needed?
  • White Paper
  • scissors
  • cardboard red
  • ribbon
  • toothpick
  • Scotch
Charming truffle boxes

How it's done?
  • Download this template. Print and cut out.
  • Bring it on cardboard. Cut.
  • Bend the tabs.
  • In the center, place chocolate truffle or any other candy.
  • With the help of a small piece of adhesive tape fasten teeth together.

Charming truffle boxes

Now you can decorate the box as the main picture, that is tying a bow and sticking a toothpick with a flag, or you can come up with something yourself.

6 November 2014

Easter basket

Easter basket

The heart rejoices the soul sings! And all because of an approaching wonderful holiday - Easter. It's time to think about gifts relatives. What could be the best Easter goodies than a basket of Easter eggs with sweet Easter? Today I will tell you how to make a great Easter basket made of cardboard, but you already can decide for itself what to fill this beauty.
You will need: cardboard from old boxes, colored paper, cloth, glue, ruler and scissors.
Starting!
1. Take any used box and Cut an oval desired size and sidewall 12 cm tall .

Easter basket

2. These parts warehouses basket

Easter basket

Here's what has to come out.

Easter basket

3. Dilute with water and glue obkley basket wipes soaked in this solution.

Easter basket

4. With colored or painted watercolor paper Cut Flowers (choose the form of their own) and grass .

Easter basket

That's about as cut flowers and green stripes have come out of thee.

Easter basket

5. Decorations basket Manufactured by greenery , flowers and fence .

Easter basket

Easter basket

The middle can send colorful silk or cloth gas or transparent colored paper .

Easter basket

27 October 2014

Lilies of the tapes

 I offer you a wonderful master class on creating lilies of the tapes in the art kanzashi. These flowers are great for decorating hair clips and headbands.

Lilies of the tapes

  • For work, we need:

  • satin ribbon 5cm wide

  • scissors

  •  fishing line

  • Beads

  •  soldering-iron 

  • thermo-gun


Lilies of the tapes

Cut the ribbon into pieces the size of a 5 * 5 cm. On one lily leaves 5 blanks on buds - 2-3 work piece.

Lilies of the tapes

Take the square billet.


Fold in half, get a smaller triangle.


Fold again, it turns out even less.

Lilies of the tapes

Here's what happened.

Lilies of the tapes

Lilies of the tapes

Adhere to the work piece with a knife.

Lilies of the tapes

And cut off the excess with a soldering iron.

Lilies of the tapes

Here's a neat petal we have.

Lilies of the tapes

The view from the other side.

Lilies of the tapes

Here is the template for our flower.

Lilies of the tapes

Now fold the seam cut our blank inside.

Lilies of the tapes

So looks ready for the future lily petal.

Lilies of the tapes

Closer.

Lilies of the tapes

By the same token we do the rest of the petals.

Lilies of the tapes

 It looks like the petals in the form of inside-out.

Lilies of the tapes

View from the front side.

Lilies of the tapes

Now you are ready to assemble our flower. Apply a bit of hot glue on the front side of the petal.

Lilies of the tapes

Something like this.

Lilies of the tapes

Apply a second flap and firmly presses his hands.

Lilies of the tapes

Here's what we've got.

Lilies of the tapes

So stick together five blanks. Do not forget that the adhesive should be applied to the front side of the petals

Lilies of the tapes

View from the inside out.

Lilies of the tapes

 Getting pestle. Take three pieces of line length of 4-5 cm.

Lilies of the tapes

On the edge of the line we put a drop of hot glue.

Lilies of the tapes

And once we fix the bead.

Lilies of the tapes

Do these three things.

Lilies of the tapes

On the edge of the front of the glue is applied.

Lilies of the tapes

Putting a blank.

Lilies of the tapes

Applying glue to the edge, on the same principle, as we previously glued onto.

Lilies of the tapes

Rolled, clung.

Lilies of the tapes

Rolled, clung.

Lilies of the tapes

View closer.

Lilies of the tapes

For bud stick together three petals.

Lilies of the tapes

Making leaves. To this end, cut green tape into lengths of from 9 to 12 cm. Beautiful when the leaves of different lengths are obtained.

Lilies of the tapes

Glue the leaves to the flower.

Lilies of the tapes

Here's a lily we have.

Lilies of the tapes

Sawn bud pasted in sheet.

Lilies of the tapes

James looks like a flower on the back side.

Lilies of the tapes

Putting flowers, buds and leaves on your taste. Our lily of the tapes ready! 

Lilies of the tapes

Lilies of the tapes

Lilies of the tapes

Lilies of the tapes